Live streaming Ustream + Raspberry Pi + Camera board
This is a rewrite of a post from an older blog of mine:
https://porsiserompeeldisco.blogspot.com/2014/01/live-streaming-en-ustream-con-raspberry.html
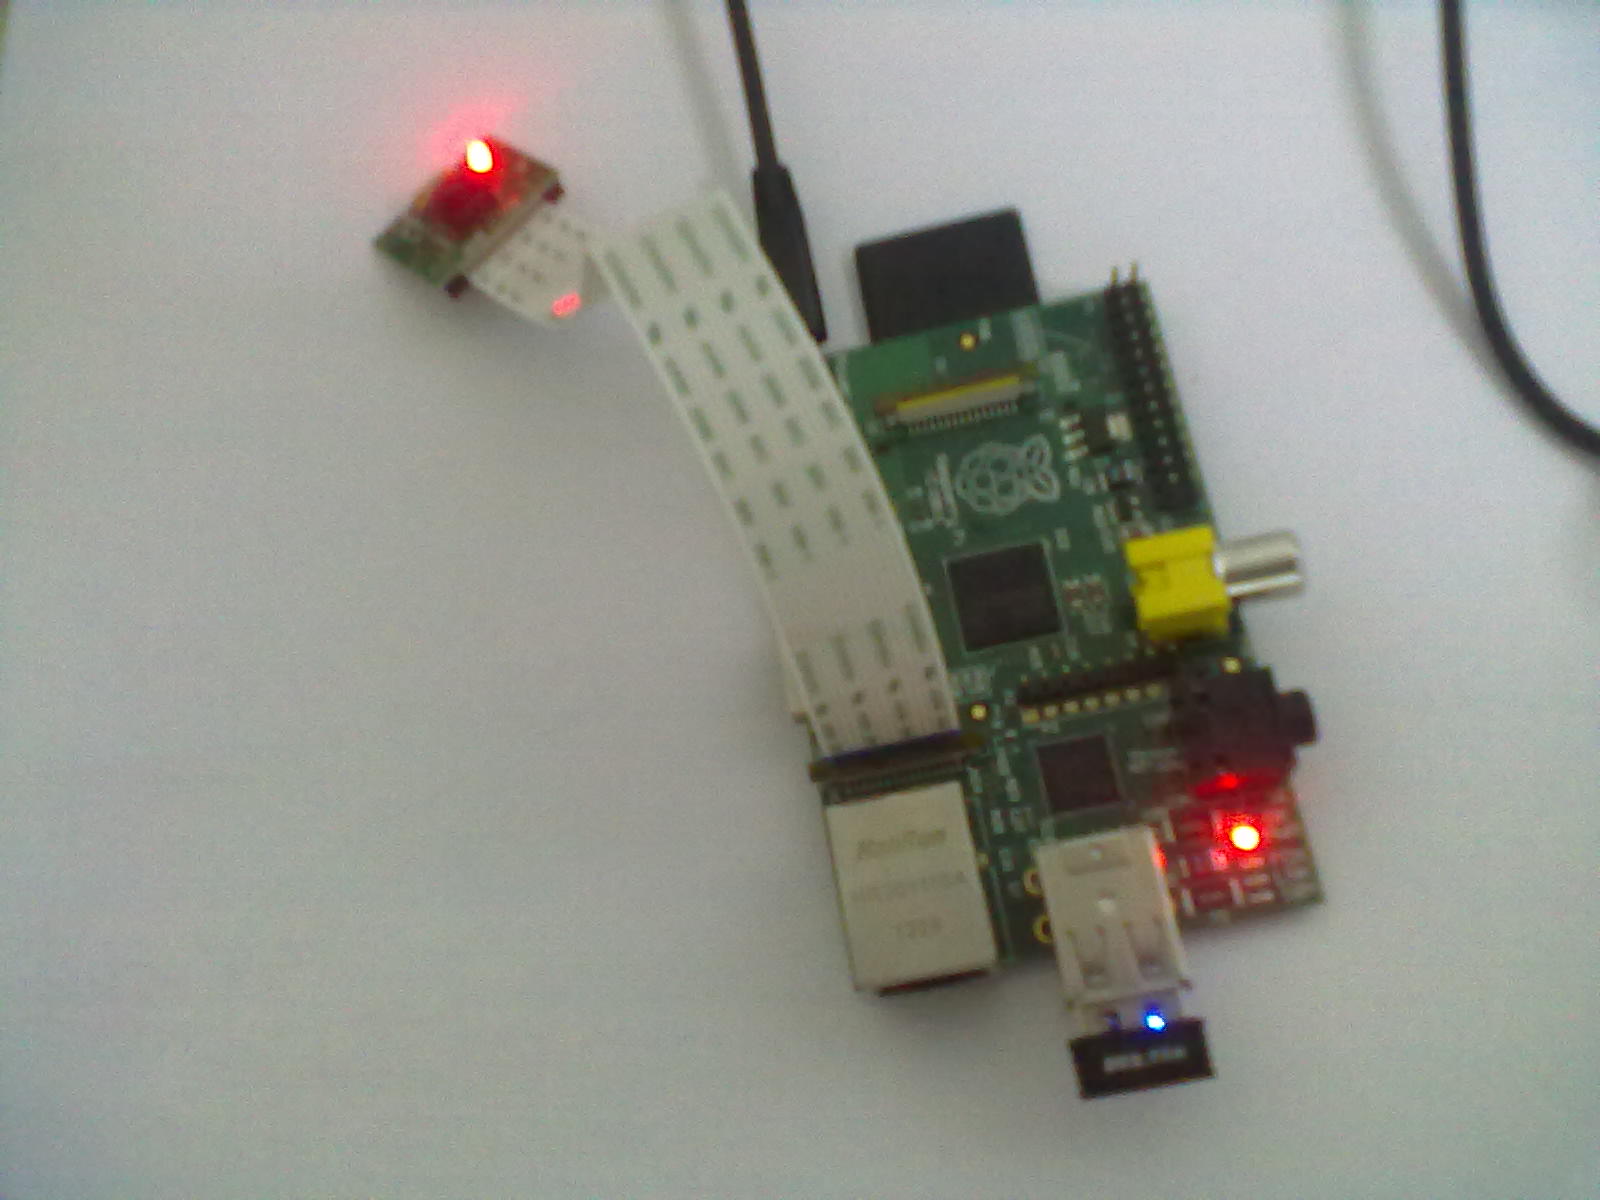
Camera board easily allowed to add video support to Raspberry Pi. It only required to connect the board and upgrate the raspbian firmware.
Camera board installation and configuration
First steps are listed here: http://www.raspberrypi.org/camera. This is a summary:
-
Connect the board with RPi powered off. Follow instructions from this video: http://www.youtube.com/watch?v=GImeVqHQzsE. We should be careful regarding the cable orientation. Camera will be connected like this:
-
Updata raspbian related packages
sudo apt-get update sudo apt-get upgrade -
Run RPi configuration command:
sudo raspi-configand select camera –> enable
select finish to exit and reboot the RPi.
First tests with the camera
Firmware update provides some additional commands to manage the camera. For example, raspivid allows to capture video and raspistill allow to capture images. Some examples:
raspistill -o image.jpg # Save image in file image.jpeg
raspivid -o video.h264 # capture a 5 seconds video -by default- in file video.h264
raspivid allows to send video to the standard output and this will be used to show the streaming next.
There are a lot of additional uses for this camera. For example, there are some streaming methods using netcat. Streaming is also possible using cvlc or ffmpeg as video source and regular vlc as streaming client.
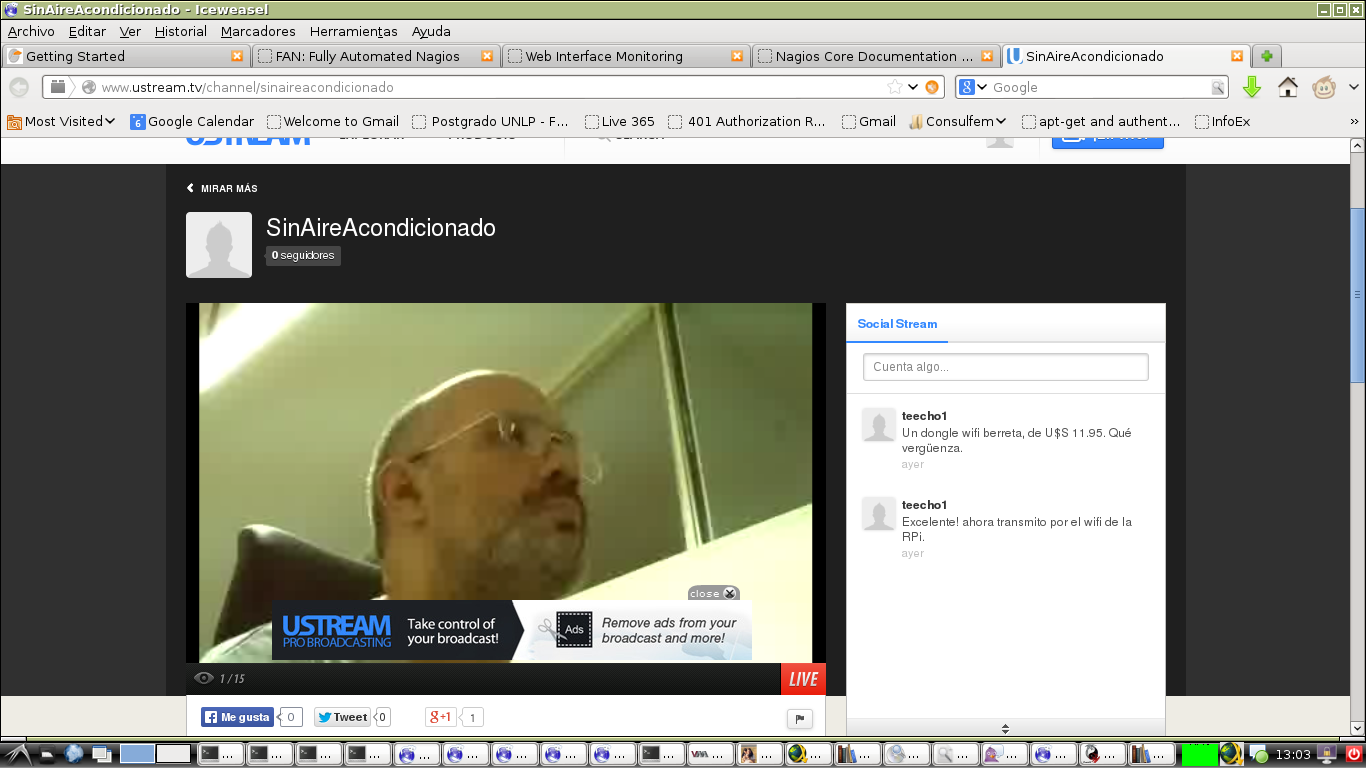
Using ustream to publish streaming
Ustream is one of most used streaming services on the Internet. Free user allows to do some tests. Once we register we area allowed to create a channel (“testchannel”, p.e.).
A channel has a property called remote. This property defines the URL that we should use as destination for our local streaming source. It also includes a key to avoid any external intrusion to our transmission.
The full URL for the destination includes both elements:
<url_rtmp_type>/<key>
Example:
rtmp://1.22114414.fme.ustream.tv/ustreamVideo/22114414/FKedARaaBeakurSacaADTufB5vaan7SL
We can send the raspivid output to Ustream but we should transcode the video in the middle using avconv. Full command looks like this:
raspivid -o - -w 460 -h 270 -t 9999999 | avconv -r 10 -b 350k -i - -f flv rtmp://1.22114414.fme.ustream.tv/ustreamVideo/22114414/FKedARaaBeakurSacaADTufB5vaan7SL
In this case we are capturing a video with size 460x270. The result is being processed by avconv. This command transcodes the video to flv format and sends it to Ustream.
We can now access the url of the channel and see the results: http://www.ustream.tv/channel/testchannel
These are some screenshots of the transmission: